So you want to breed ball pythons...
So you want to breed ball pythons… and you’re not quite sure what you are doing. I’ve documented the whole process in pictures. This is a very basic breeding recipe that works for us. Through pictures we hope to show and explain to you, the… ummm… ins and outs of breeding.
In October we lower our temps at night. The hot spot goes down to 82 F and the cool end is 78 F. We start to adjust our lighting to make shorter days. 14 hours dark – 10 hours of light. We use natural sunlight spectrum bulbs in our room. Although Ball pythons come from Africa and they live on or very close to the equator, where there is no light change (12/12), we still increase the length of darkness during the breeding season. Is there any scientific reasoning behind it? Not really… it’s just the way we do it and it works for us. I think more hours in the dark lead to more security. More security… the more comfortable they are and the more they may breed. It also marks a change in seasons.
Starting November 1 we introduce males into the female’s containers. We leave them in for 2-3 days or shorter if we observe copulation. We try to breed every female at least once every shed cycle. Some do more but this works for us and we don’t exhaust our males this way. We continue to feed during the breeding season, but only small meals (3-4 week old rats) and only every 10 days depending on where we are in the breeding cycle.
We feed our snakes as long as they want to eat. When they stop feeding on their own is usually a good sign and a time to look for signs of building towards ovulation (see pics below).
We continue to observe and document all activity… positive or negative. Humidity is in the 60-70% range in our room all year. While many breeders start palpitating for follicles in January, we do not. I wait until mid February. I’ve been fooled when I didn’t feel any early only to have females go on and ovulate. I also look for other obvious signs that are be covered below.
On March 1 I start to raise temps back to normal 24/7. 92 F hot spot – 82 F cool end. I keep pairing until I see obvious signs or until the end of May.
As a rule… males usually start breeding consistently their 2nd winter at 800 grams or more. Some will breed earlier, but that is the exception rather than the rule. I have had males breed as early as 4 1/2 months and as light as 394 grams. Again… this is a rare exception. I have heard of instances where males have died from over-breeding. They are not machines! 3 days on… 3 days off is the way I do it. If they breed in the first day of their 3 days, they get 3 days off.
Females are usually ready to be bred their 3rd winter and over 1500 grams in weight. Some will go their 2nd winter but they still must be 1500 grams or more. There have been instances where smaller females have produced viable clutches but it is rare and the clutches are small.
Bigger is not always necessarily better! Power feeding is NOT the way to go! A nice consistent growth is much better and healthier. This is NOT a race!
That’s it in an eggshell! I hope it helps you out! The photos below document every step. Hopefully these visual aids will give you a better understanding of the breeding process.
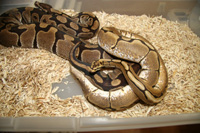
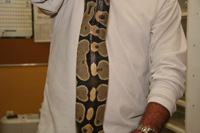
Courting
When a male is introduced to a female it doesn’t take long before he shows interest. He gets as close as he can and tickles her with his spurs. His spurs move just like a human finger, back and forth…back and forth. He tickles her until she is receptive. When in position, he enters her.
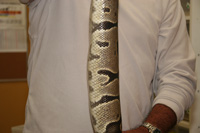
Good lock!
Once in, he locks himself into position and stays that way anywhere from 4 to 24 hours! Talk about staying power! Must be related to ‘Sting’. Actually the whole process is not that exciting to watch. They very rarely move.
Another Good Lock
The male and female stay very close at all times.
Ahhh… Love is in the air.
Is this a lock?
Sometimes you might think your pair is breeding, but unless I see a lock, it doesn’t count.
This definitely is!
No doubt about this one. Lock and load!
Done like dinner. Zzzzz… Zzzzz…
Look very closely and you will see a smaller male all nice and cozy like, smack dab in the middle of this big female. With snakes, size doesn’t matter. Really!!! This male was 395 grams and 5 months old when he started breeding!
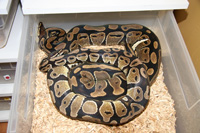
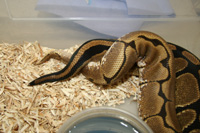
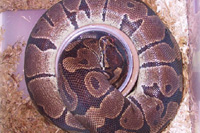
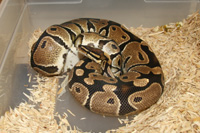
Developing Behavior
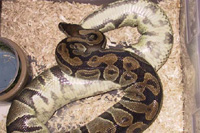
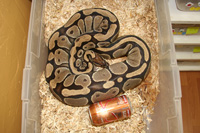
When females start to grow follicles their behavior changes. They seek the cooler end of the cage and often wrap themselves around their water bowls. Whether it is too enhance the cold is purely speculative. It is very common and a very good indication of good things to come.
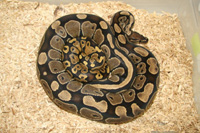
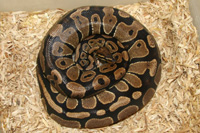
Lumping
I have often heard some breeders refer to their females as ‘lumping up’. I’m not sure what that means exactly but I often see females wrapped around water bowls or not with what looks like lumps or kinks in their body. This seems to happen when building follicles.
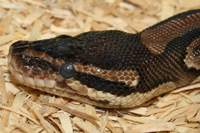
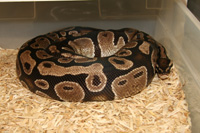
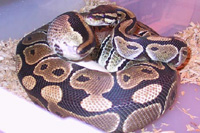
They “Glow Before They Go!”
My females go through a drastic color change when they are nearing ovulation. They can change color up to 6 weeks before. I call it ‘Glow before they go’. This usually takes place after their pre-ovulation shed. If they GLOW… they usually go!
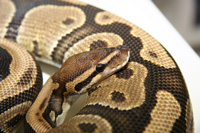
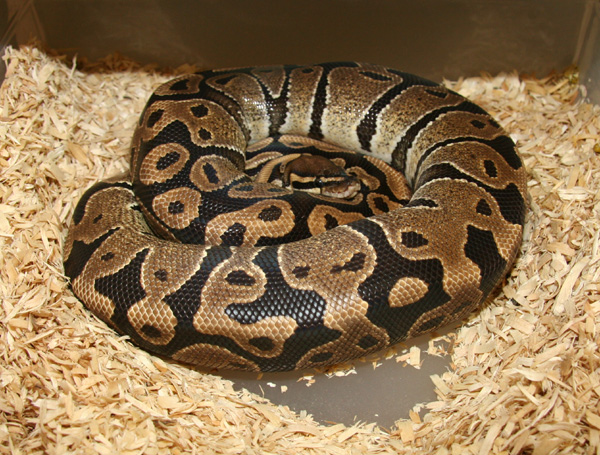
More Glow!
The glowing effect is very evident in the head and neck area. Some females almost look like ghost/hypos. It is quite a transition and can be quite shocking. I find myself asking, “Where the heck did you come from?” A complete color transition is incredible to see.
Laying Inverted
This is another good sign! Chances are you will catch your female laying inverted. Although quite common, it isn’t a sure sign of eventual ovulation. I’ve seen some of my males lying inverted on occasion. Usually after they have bred for 24 hours!!! Go figure!
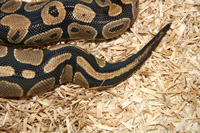
Building!
Anywhere from 6 weeks prior to ovulation, females begin to build. They start growing follicles well before, but now you can see the build. Still seeking the cool end, they develop a body swelling about two thirds of the way down their body.
See the Build?
If you hold them up and get them to relax, when they drape down loosely, without tension in their body, you can see a WOW in their profile. This swell gets bigger until ovulation is reached.
Quite the paunch!
Look at her from the side and you can see her belly protruding as if she has a full belly. The fact that she hasn’t eaten a meal should indicate that she is well on her way to ovulation. Keep a close eye! Quite often females will look at you with that “Do you think I look fat” look in their eye. Don’t answer them! You can’t win!

Finally! Ovulation!
People often ask, “How do I know when my female is ovulating?” Trust me… there is no mistaking it! She looks like she has swallowed a jumbo rat. She is hard. She is miserable. And she is huge! You can see the swelling 3/4’s of the way down. 44 days till eggs!
Tail Suck!
When they ovulate, their tail looks like all the fat is being sucked out of it. It looks very scrunched. Sometimes they will have a scrunched tail prior to ovulation without the body swell. This is just part of the building process.
Pre-lay Shed
Shortly after ovulation, most females go into a pre-ovulation shed cycle. They usually shed 16 days after. From this date my females usually lay 27 days later… give or take a few days. The pre-lay shed is the best date from which to start your countdown!
Pre-lay Soak
Humidity is a must during this period. The female will sometimes seek additional humidity while in shed by soaking in her water dish. I often dampen my substrate prior to this time and keep the humidity in the 65 – 70% range.
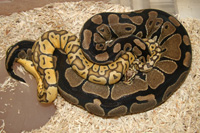
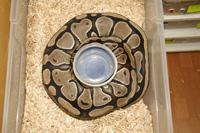
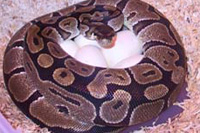
Heat Seeking
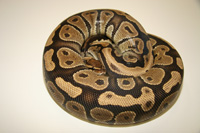
Once she has ovulated and shed, females really seek the warmth of the cage. They hug the hot spot forming a perfect coil. The closer to disposition the more perfect the coil. Just prior to laying her clutch she moves around the cage in a very restless fashion, then settles in to work. Perfect coil… tail in the center.
Ridge Back
Another characteristic of gravid females is that they go from that nice round look to having a v-shape to their backs. It looks like their spines are more pronounced and are more triangular in shape. This is common in all females that are gravid and takes place after ovulation and becomes more evident after closer to laying time.
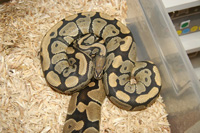
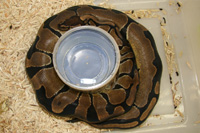
Perfect Coil
Females that are gravid and particularly ones that are very close to laying, will lay in a perfect coil most of the time. On one occasion I missed ovulation and noticed my female laying in a perfect coil. I suspected something and my hunch was correct. 27 days after her last shed she produced 8 perfect eggs!
Egg Adjustment
Just prior to laying their eggs, females become very restless and move around a lot. I sometimes see them folding their body oddly. It’s as if they are trying to move their eggs into position for laying. It is similar to what we with a tube of toothpaste to move the paste closer to the exit hole. Just an observation!
Stand back! She’s gonna BLOW!
She makes a little nest and when all is quiet she usually start her laying. It can take several hours before all the eggs are deposited. Females gets very agitated easily, so it is best to stand back and away at this time. I know… but it is soooo cool!
Don’t mess with me!!!
Females tend to be very nasty and extremely protective after they have laid their eggs. For a step by step process on how to remove her from her eggs go to the ‘Egg Removal’ page.
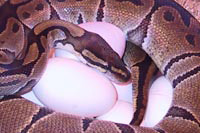
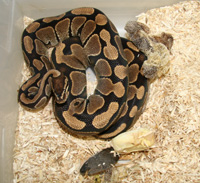
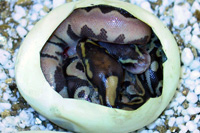
OK, I see 1… 2… 3…
Females are very attentive to their eggs. It’s quite touching actually. Now is the time to remove her so that you can place the eggs in the incubator container. Most of the time I gently grasp her just behind the neck and at the base of the tail and unwrap her from the eggs.
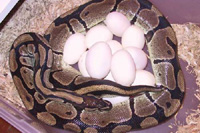
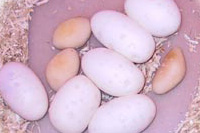
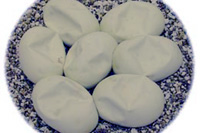
Big Job! Bigger Clutch!
Sometimes clutches are so big she can hardly wrap herself around them. A nice 13 egg clutch! The average is 6 eggs. Make sure she is finished laying before removing her. Run your fingers down her belly to feel for any more eggs. If she has more put her back.

And weighing in at…
We weigh our clutches to get a per egg average. Some eggs range anywhere from 90 to 150 grams! They also stick together, Don’t try to separate them!!! If one falls off by itself that’s fine, but never force them apart!
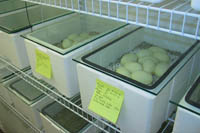
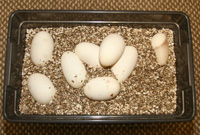
Straight to the incubator
We use a vermiculite and perilite mixture for our medium. We mix in enough water thoroughly, so that when squeezed in your hand, no water drips out and it clumps together. It should fall apart when crumpled. To wet or too dry will kill your eggs. We incubate at 89F.
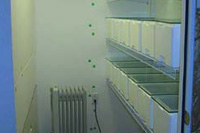
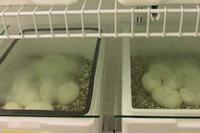
Walk on in
We use a walk-in incubator so that we can go in and check on the eggs regularly without really disturbing them. We closely monitor the heat and humidity with remote sensors. We use a Herpstat ND thermostat hooked up to an oil filled radiator. A fan circulates the air.
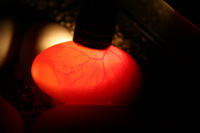
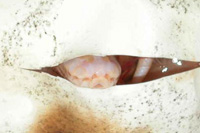
Are they fertile?
We candle the eggs to see if they are fertile. We use a small maglite flashlight. We turn off the lights and hold the flashlight up against the egg. A fertile egg has a series of veins through part of the egg. Absence of veins means it is not fertile and it will soon deteriorate.
Slugs!
Sometimes you will get slugs. They are eggs that were never fertilized. I have gotten eggs that looked good, only to discover that they were infertile. Females that are either underweight or overweight have a tendency to give us the most slugs.
Late Egg or Slug?
I had a female lay a clutch of 4 good eggs and 3 slugs. The female was coiled as if she was done, so I removed her from the clutch. Upon inspection the female had another egg inside her. It was very hard to the touch so I presumed it was a slug. I put her back and nothing happened within 24 hours. I then removed the eggs and the female. The female began eating almost immediately and 24 days later she shed, pooped and passed a big hard egg.
A Double Egg!
We had two eggs that were joined together. One side was fertile and the other was not. Eventually it too died. I cut the eggs away from the good ones only to put a small hole in one of the good eggs. It started to seep so I put a Band-Aid on it and it went full term!
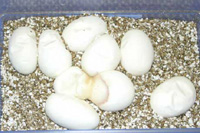
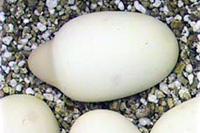
A Little Egg
This clutch consisted of 8 eggs. 7 were normal and one was small and half slug-like. To my surprise the little egg was fertile. It weighs in at only a paltry 50 grams! Will it go full term? Only time will tell. UPDATE — The egg survived and the baby weighed in at 16 grams!!! It survived and is a breeder today.
A Boob Egg
Occasionally you will get eggs that aren’t quite developed. Usually these eggs go full term but the hatchlings tend to be smaller. They catch up pretty quick though. Sometimes you get eggs with a portion of clear shell that looks like a window. You can see the hatchlings develop!
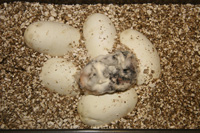
Moldy Eggs
If you discover an infertile egg thru candling, remove it carefully from the clutch and discard it. This can be done easily if it is discovered soon after laying. However If an egg dies mid-term and starts to mold and is attached to other eggs, I do not attempt to remove the egg from any other attached eggs. In my experience the mold has no ill effect on the others. This egg is 30 days old.
Condensation
About 3 weeks prior to hatching the eggs will start to sag and condensation will build up in the container. The reason for this is that the eggs are actually warmer than the ambient temperature in the incubator, due to the nearly developed hatchlings inside. It’s just like windows in your house that fog up in the wintertime.
Dimpled Eggs
As the eventual hatching date grows closer, the eggs dimple severely. They sink in and become very pliable and soft. This makes it easier for the hatchlings to cut their way out of the egg with their single egg tooth. Eggs usually hatch 52-60 days after they are laid.
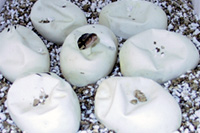
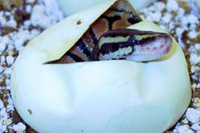
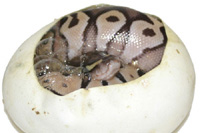
What we have been waiting for!
This is the very first hatchling ever to pip at our facility. Although it was a normal it was still very exciting to say the least! Once the first hatchling has piped we slit the rest of the eggs in the clutch.
First Morph!
Our very first morph was a Pastel Jungle. The very first Pastel Jungle ever produced in captivity fathered it. See ‘Pastel Jungle Story’. Fitting… wasn’t it? We acquired the male from the king of Pastels… Greg Graziani. Greg taught us a lot!
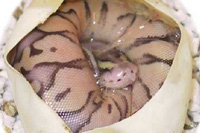
TWINS!!!
The first time I saw a normal with it’s head out. A day later I saw a Pastel!!! I was very confused until I saw these two in the same egg. I believe this was the first time two separate morphs came out of the same egg! They both survived and doing well! 2 boys.
Can you say SUPER DUPER!
In 2003 we hatched out our first Super Pastel! And man was it SUPER! Some say it was, and still is, the best super ever produced. We call it the Super Duper! There was a second Super hatched as well with a VERY unique story. We called her the ‘Miracle Ball’.
More morphs!
This is what it is all about. Producing eggs that are worth far more than their weight in gold… LITERALLY! Who need the goose that lays golden eggs? No need to climb bean stalks and fight giants. It all boils down to this!!!
The moment of truth!
There is a moment we dream about that never quite comes quick enough. The eagerness you experience is unrivaled. And when that moment arrives and you see your very first morph, no matter what it may be… it is truly magical. Good luck!

So there you have it…
I hope this has helped you in someway understand the breeding process. It’s very exciting and it always provides for many rewards and surprises. I would like to thank many in the industry that helped me by unselfishly sharing their knowledge, experience and in some cases, friendship. Among them are Brian Barczyk, Doug Beard, Sean Bradley, Joe Compel, Clint Gilders, Dan and Colette Sutherland and last but not least, my very good friends Greg Graziani for really getting me started with outstanding breeding stock my first year. I’ve always said that snake breeders never commit suicide because they are always looking forward to that next great snake!
Keep believing!
Markus